Nov 26 2012

Quick Soup Stocks in the Pressure Cooker

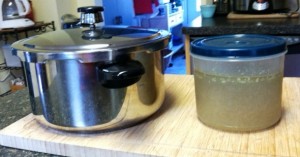
Homemade soup stock couldn’t be easier when you are using a pressure cooker.  Using this method will save you a great deal of time, and once you have soup stock made, you are ready to use the stock in cooking or for soups.

Since we just celebrated Thanksgiving, here’s the pressure cooker method for making Turkey Stock:

  1. Add the turkey carcass to the pressure cooker pot.  If it’s large, you may need to break it up into several smaller pieces.
  2. Add 1 small onion, chopped, 2 carrots, chopped, 2 stalks celery chopped, ¼ cup parsley or 1 Tb. dried parsley, 1/2  tsp. pepper, and 1 tsp. salt.
  3. Add enough water to cover the turkey bones by about 2 inches.  *Do not fill the pressure cooker more than 2 thirds full for this or any other recipe that you make.
  4. Lock the lid and pressure cook on medium pressure for 35 minutes.  Remove pressure cooker from the heat and let the pressure drop of its own accord.
  5. Strain bones and vegetables from the broth; discard bones and vegetables.
  6. Place broth in a covered container and refrigerate.  Allow fat to congeal in the top and skim off the hardened fat and discard.
  7. Your stock is ready to use or it can be from in smaller containers for later use.

    The nice part about having your own homemade stock on hand or in the freezer is that it serves  many cooking needs without the extra salt and preservatives.   Homemade stock can be made using poultry, fish or meat bones, or vegetables.  The pressure cooker saves you time, money and energy!
Comments Off on Quick Soup Stocks in the Pressure Cooker
Nov 01 2012

Revisiting the Pressure Cooker: a Convenient Way to Cook!

Many people really want to eat healthier, but because they have very busy schedules they think they will not have the time to make  healthy meals.  That’s where an old idea with a modern design comes in:  the pressure cooker.   Meals made in pressure cookers are healthy, tasty, prepared in less time and with less energy than many other methods of cooking.  A pressure cooker is not only safe, but a versatile and easy to use kitchen tool which I highly recommend. Once you get started with a pressure cooker, you may wonder how you ever did without such a useful cooking tool!

You may have seen your mother or grandmother use a pressure cooker many years ago, or heard a horror story about how unsafe these cooking devices were.  Today’s pressure cookers are very safe to use.  Modern pressure cookers have valves and vent safety systems that prevent accidental explosions, so there is no risk of injury or a huge mess in the kitchen.

One of the benefits of a pressure cooker is that you can prepare a meal with little to no oil.  You will need to add liquid, however, and this could be a soup stock or just water. Foods are cooked in a fraction of the time. A tough cut of meat, for example, a pot roast, might take several hours to cook in a traditional way.  In a pressure cooker you can prepare a very tender pot roast and vegetables in less than an hour.  Dried beans, which can take 1-2 hours on the stove-top can be cooked in under 30 minutes.

When using a pressure cooker, you can prepare an entire meal (ex.: meat, grain and a vegetable) all together in one pot.  Simply add the foods, seasonings, and a liquid. The nutrients are retained because the liquid is conserved.

Pressure Cooker Buying Tips

  • If you decide to try out a pressure cooker, consider the size you will need.  A 4-quart may be the right size if you are cooking for two, and the 6-quart size should meet the needs of a family.  Keep in mind that a pressure cooker should not be more than 2/3rds full for most foods
  • Buy a pressure cooker that is made from high quality durable stainless steel, with a 3-ply bottom
  • Choose pressure cooker capable of reaching 15 pounds per square inch(psi) and one that has a quick release option built into the pressure regulator

Pressure cookers come in various price ranges, and like everything else, you get what you pay for.  Buy the best that you can afford and this kitchen tool will serve you well for many years.  Here are two pressure cookers that I like for their quality and ease of use.

Comments Off on Revisiting the Pressure Cooker: a Convenient Way to Cook!

Oct 20 2012

Swiss Chard – The Garden Crop That Keeps on Giving

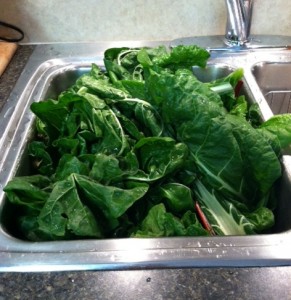
Several years ago, I opted to grow Swiss chard instead of spinach in my garden.  I have to say, that my results have been exceptional year after year.  Swiss chard seems much easier to grow and I have actually been harvesting it from the garden since early spring right on up until last weekend.  As you can see my sink is full of Swiss chard.  This last harvest came in a just under 5 lbs.!

Here’s why I really like Swiss chard…First, it tastes so similar to spinach that when I prepare and serve it as a spinach replacement, no one knows the difference.  Second, Swiss chard is a nutrient dense food, meaning there is superior nutritional value comparative to the caloric value.  1 cup of cooked Swiss Chard contains just 35 calories, with high amounts of Vitamin A, Vitamin K, iron, and a host of other vitamins and minerals.  A serving provides 4 grams of fiber.

I have had so much Swiss chard this past growing season, that I had to come up with a number of ways to use it.  The obvious is to steam it just as you would with fresh spinach.  I have found other uses in soups, lasagna, mixed green salad, and with this latest batch from the garden, I made Swiss chard pie.  After a quick search on the internet, I settled on Martha Stewart’s recipe for Swiss Chard Pie. 

With all of the Swiss chard I had on hand I made 2 pies, baking one for dinner and putting the other unbaked pie in the freezer.  This recipe was very good and I would likely make it again.  I made the pie recipe exactly as written, except I switched out half of the white flour with white whole wheat flour.  Very good indeed!

Comments Off on Swiss Chard – The Garden Crop That Keeps on Giving

Oct 10 2012

Quick Solution Breakfast: Baked Oatmeal

Everyone knows they should eat breakfast, but if you are one of those people who never seems to have the time to make breakfast in the morning, here’s a breakfast that you can make once and have for several days.

I have been making steel cut oats ahead of time for quite a while, but this was something I had not tried before.  I have to admit, it was quite easy and very good!  Since it’s apple season,  I use sliced apples and a small handful of fresh cranberries.  I see no reason why berries (fresh or frozen),  sliced banana or even puree pumpkin would not work equally well. I’m going to try adding pumpkin the next time I make it.

What makes this recipe really great for people rushing out the door in the morning is you can actually cut a piece of the oatmeal and take it with you!

Here’s how to make it:

Comments Off on Quick Solution Breakfast: Baked Oatmeal

Oct 03 2012

Weekend Project: Homemade Soup

Now that the weather is cooler, I am more than happy to start making homemade soups again. Many of my clients tell me how much they like having soup for lunch in the colder months, but most of the time, they name off various brands of soups bought at the store.  Don’t get me wrong:  many commercial soups are great options for the calorie conscious.  The problem with canned soups, of course, is the sodium content.  Some products have an excess of 1000 mg of sodium per serving.  To my way of thinking, this is far too much salt for one simple food item.  So while it’s easy to turn to grocery store shelves for your lunchtime soup, consider making your own soup.

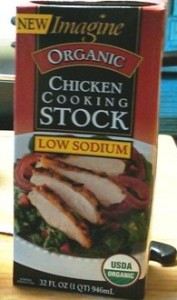
The beauty of homemade soup is that you can literally take any basic soup recipe and modify it based on ingredients you have on hand. You can make adjustments and get the sodium content reduced without foregoing good taste. Most soups start with a stock, broth, or a vegetable base. You can make your own stock if you have the time, but starting with a ready made broth can cut down on preparation time. If you buy ready made soup broth,  I recommend that you read the labels carefully.  Regular broth will make your homemade version of soup just as high as the canned soup.  The low sodium versions of broth have sodium  too!  I found that most of the “low sodium” brands of broth had close to 500 mg. sodium per serving..still too much if you are sodium conscious.  I found several organic low sodium stocks with just 140 mg. per serving, so it pays to look around.

If you want to try making homemade soup for your lunches, here’s an idea:  make one batch pot of a different soup every week. Keep enough of the soup on hand for one or two meals, then freeze the rest in smaller containers, preferably 1-2 portion containers.  If you make a different kind of soup each week, you will soon have a “selection” of different soups in your freezer that you can choose from for a quick lunch or dinner meal. Take a single serving of frozen soup to work  and you’ll have a nice healthful meal ready to heat up.

Here’s the soup I’m going to make next:

Vegetable Barley Soup

2 Tb. olive oil

1 cup chopped onion

1 cup diced carrots

12 oz. fresh mushrooms chopped

1/2 cup barley (use pearl  or hulless barley)

6 cups low sodium beef, chicken or vegetable broth

1/2 tsp coarse salt

2-3 cups chopped spinach, kale or Swiss chard

1.   Heat oil in large pot and saute onions and carrots until tender.  Add mushrooms and cook for another 2 minutes.

2.  Add barley, low sodium broth, and salt.  Bring to a boil, then reduce heat to simmer until barley is done. (Pearl barley takes about 40 minutes;  hulless barley takes about 60 minutes to cook) Add chopped greens and cook for an additional 5 minutes.   Serves 6.

Comments Off on Weekend Project: Homemade Soup

Sep 23 2012

Is Brown Rice the New Food to Avoid?

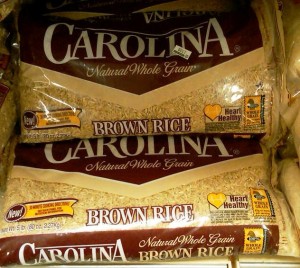
If you followed the news this past week, you may have seen the headlines regarding concerns over the arsenic levels in brown rice.  A new study by Consumer Reports indicates that many brands of organic brown rice, certain rice cereals and baby rice cereals contain levels of arsenic that are troubling.  The report states that both inorganic and organic arsenic were found in a wide variety of rice products.

This comes at a time when many health conscious consumers have switched from white rice to brown rice, because it is a whole grain.  It turns out that the brown rice actually has a higher level of arsenic than the white rice because the outer shell is still intact.  Brands of rice grown in Louisiana, Texas, and Missouri appear to have the highest levels of arsenic.  These are regions where cotton was grown a century ago and are now rice fields.  Cotton fields were treated with arsenic pesticide to control the bowl weevil, and now a century later, the higher levels or inorganic arsenic is still in the soil.

Arsenic is a known carcinogen, and is especially harmful to brain development in babies.  The FDA has released this statement on arsenic:  “Based on the currently available data and scientific literature the FDA does not have an adequate scientific basis to recommend changes by consumers regarding their consumption of rice and rice products”

So until the FDA does more study on this, using a certain measure of caution might be in order.  Consumer Reports recommends that people consider limiting their families’ exposure to arsenic by reducing the frequency of times rice and rice products are served (one to two times weekly).  Overall, they do not suggest that we “cut out” all rice from our diets, but instead reduced consumption until more is known.  Consumer Reports reduction guidelines are more stringent for children than adults.

As for myself and my family, we will continue to have brown rice in the one time a week frequency that is usual for us.  With all of the other whole grain products out there to choose from there are plenty of other options to choose from to fill in the gap.

Comments Off on Is Brown Rice the New Food to Avoid?

Aug 22 2012

Basil – An Herb for Kings and the Rest of Us

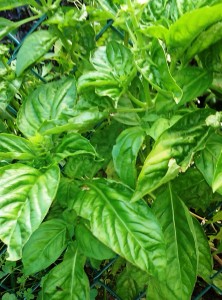
I don’t know about the rest of the gardeners out there, but I have had a banner crop of basil this year. Whether it was the hot weather or the early spring, I can’t say, but I have ended up with an overabundance.  Soon the fresh basil will be gone and the only way to get it will be to buy (overpriced) fresh basil in the store.  My challenge has been how to come up with ways to make the most of what I have.

Before I tell you how I’ve been using my basil, here’s a bit of background about this wonderful herb.  The word basil is found in the Greek language and means “king.” Basil may have been used in “some royal unguent, bath, or medicine” and is sometimes referred to as the “king of herbs.”  Basil is grown all over the world and I can attest to the fact that it grows prolifically here in New York!  Basil is rich in phenolic compounds that have strong antioxidant properties, phytochemicals, carotenoids, and it has antibacterial properties.  So basil  not only adds good flavor to foods, it’s good for you!

Basil is a natural with fresh tomatoes or tomato sauce, but it can work well with as a seasoning in soups, stews, or salad dressings.  My favorite way to store basil for later use is to freeze it.  I find that frozen basil tastes fresher than dried basil.  The procedure to freeze basil is quite simple:  Remove the basil leaves from the stems, rinse and dry thoroughly (I like to use the salad spinner to remove excess water) and seal in freezer bags.  When you need  a bit of basil to cook with, just take out a few whole frozen leaves or crush in the plastic bag while it’s still frozen.  Easy!

Another way to utilize extra basil is to make basil pesto.  This is simply a concentrated, fragrant, and flavorful “sauce” that can be added to  pasta, cooked whole grains, poultry, fish or vegetables.  If you have a food processor, you can make a small batch of pesto in a few minutes.

Basil Pesto

2 cups fresh basil, packed

1/2 cup fresh parsley

4 cloves garlic

zest of 1 lemon

1/4 cup pignolia nuts

3/4 cups Parmesan or Romano cheese, grated

1/2 cup olive oil

1/4 tsp. salt

1. Combine basil, parsley, and garlic in food processor and blend into fine paste.  Scrape down sides of bowl as needed.
2. Add lemon zest, pignolia nuts, cheese and salt; blend well.
3. With food processor running, pour oil through feed tube and mix well.
4. Transfer pesto to jar.  Cover surface with a 1/8″ film of olive oil.  Seal with lid.

*Pesto can be frozen or stored in refrigerator for 3 months.  Stir top layer of oil into pesto before using.

Enjoy!

Comments Off on Basil – An Herb for Kings and the Rest of Us

Aug 02 2012

Is Juicing Better Than Eating Fruits & Vegetables?

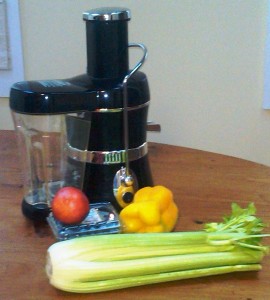
Lately I have been hearing a lot more about juicing.  It seems as though juicing is being touted as having greater health benefits, and juice fasts have become all the rage for many who are trying to lose weight.  Supporters of juicing say that juicing is better for you than is eating whole fruits and vegetables because your body can absorb the nutrients better.  Yet, there is really no scientific evidence to support that.  The the idea that the enzymes found in raw fruits and vegetables have special powers is erroneous as well. Enzymes found in raw produce are broken down by your stomach juices during the digestive process regardless of whether they are juiced or whole.

I am not against juicing, but I think people are expecting far too much  from the juicing concept.  When you use a juicer, only the juice is extracted from the raw fruit or vegetable. The fiber, an essential nutrient for digestive health is removed during juicing process and you miss out on the fiber.

Juicing certainly is not unhealthy, and included as part of a healthy diet seems to do no harm.  If you are not a lover of fruits or vegetables, juicing may be a way to get some of the essential nutrients you may not otherwise consume.  Drinking too much juice could result in sudden weight loss or diarrhea.  It could also result in consumption of excessive calories or spike your blood sugar, particularly if the juice is made mostly from fruit.  Think about this:  it may take up to six pieces of fruit to make one glass of juice…would you eat six pieces of fruit at one time?

If you want to start juicing, here are a few tips to help you get the most out of the juicing experience:

  • Prepare only the amount you will drink, and consume the juice soon after you make it; fresh juices can deteriorate quickly and develop harmful bacteria
  • Don’t rely too heavily on fruit; try using mostly vegetables and add 1 serving of fruit for a bit of sweetness
  • If you haven’t purchased a juicer yet, consider one that allows you to reserve rather than discard the pulp; incorporate the pulp back into the juice or use it as an ingredient in another food you are preparing
  • If purchasing commercially prepared fresh juices, make sure they are pasteurized to prevent bacterial contamination

Have fun experimenting with your juicer, but don’t forget to eat those whole fruits and vegetables too!

Comments Off on Is Juicing Better Than Eating Fruits & Vegetables?

Jul 15 2012

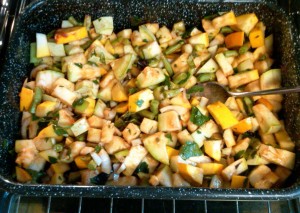
Oven Roasted Ratatouille

Well, here I am a week later and still coming up ways to prepare the yellow, golden egg squash!  The squash plants are very prolific and there have been many more since last week.  I have given many away, but the plants are producing more than I can keep up with!

This week I decided to make what I call “ratatouille.”  My version is roasted in the oven, and uses many of the vegetables and herbs I happen to have on hand.

  • 2 yellow squash cubed
  • 1 green squash cubed
  • 1 large onion diced
  • 2 cloves garlic minced
  • 1/2 lb. fresh green beans
  • 1 cup tomatoes, chopped
  • 1 cup chopped fresh parsley
  • 1/2 cup chopped fresh thyme, basil, & oregano (a mixture of all three) – 1 tsp. each if you are using dried
  • 1 tsp. salt
  • 1/3 cup olive oil

Mix all ingredients together in large rectangular roasting pan.  Roast in 400º oven for 45 minutes until vegetables are tender and top layer of vegetables are lightly browned.  Remove from oven; stir in 2 Tb. balsmic vinegar.   Enjoy hot or cold!


Comments Off on Oven Roasted Ratatouille

Jul 10 2012

Squash Anyone?

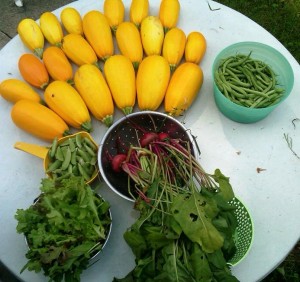
squashAh vacation!  It’s so nice to get away, but when you have a garden, you may come home to find a mini vegetable explosion!  Here’s what was waiting for me when I got home after a week:  21 yellow squash (a new variety this season called “golden egg), green beans,  sugar snap peas, beets, and a large colander of mixed salad greens!  I haven’t gotten out to cut the Swiss chard yet, but there’s a huge bunch waiting to be cooked.

Yes, gardening has it’s advantages, but it can be pretty challenging when it all comes at once.  Besides giving away some of the yellow squash to friends, I decided to roast a large amount of it on the grill because it is so delicious this way, and keeps for several days.  Here’s how I prepared the grilled squash:

Slice 3-4  yellow squash lengthwise into 1/4″ slices and layer in an oiled  pan.  Spray a fine mist of olive over each layer, then cover with foil.  I set the pan on my outdoor grill (it’s too hot to start up the oven) and cooked until the squash was lightly steamed.  Once the squash is partially cooked, finish off the squash on the grill:  each side takes about 3-5 minutes.  Remove grilled squash to a covered container, and drizzle 2-3 tablespoons of herb infused olive oil over slices and mix lightly.  I made an herb infused olive oil by adding  1/2 tablespoon each of minced fresh lemon thyme and oregano to 3 Tb. olive oil and heating in the microwave for about 15 seconds.  Heat just enough to warm the oil and allow herbs to flavor the oil.  Delicious hot or cold!

Comments Off on Squash Anyone?

« Prev - Next »